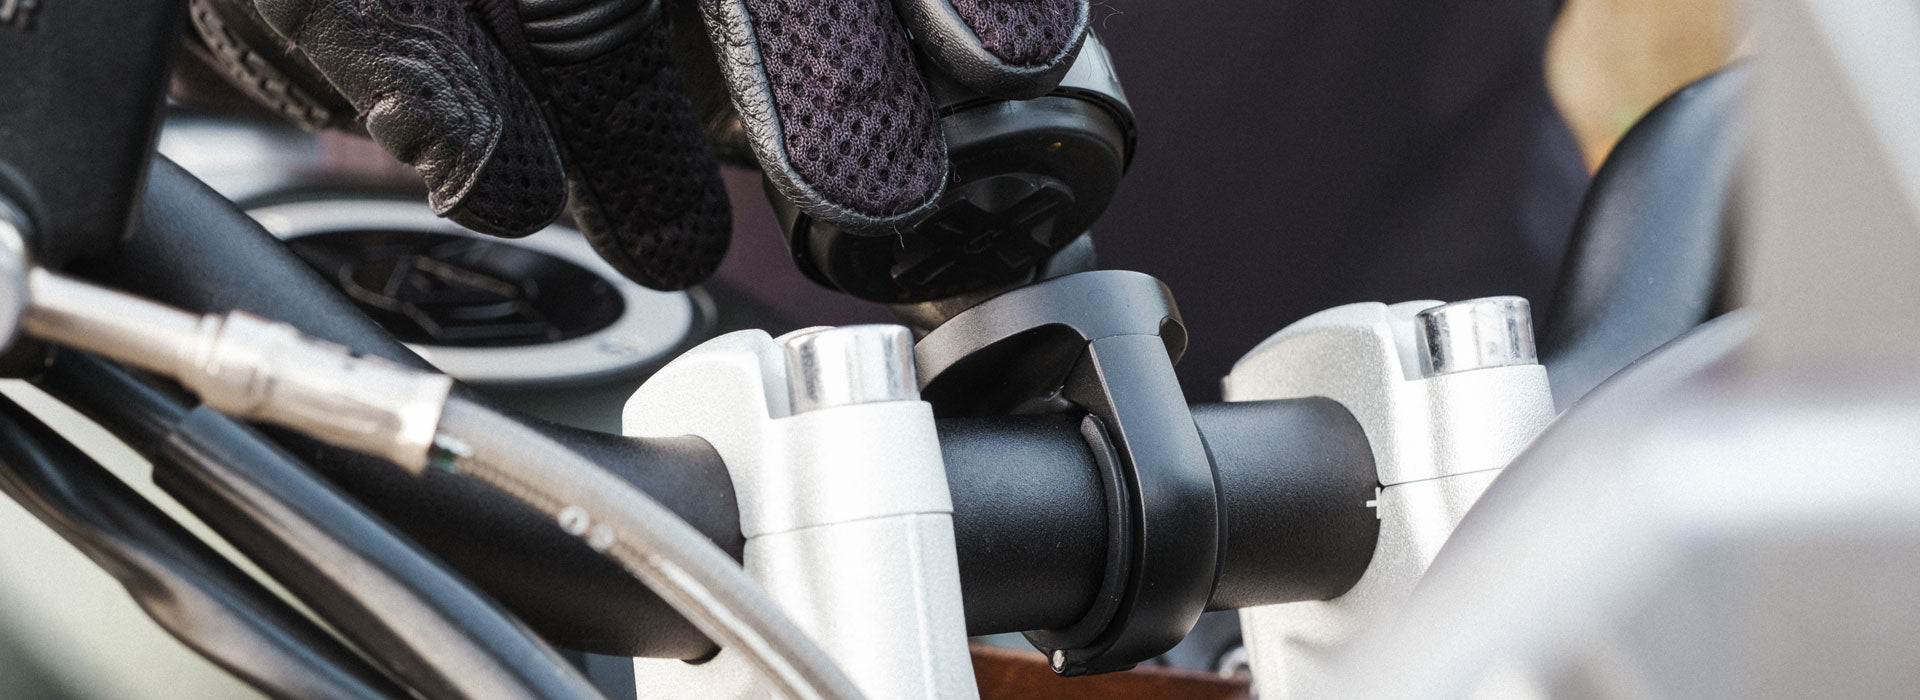
Installing your Moto II Bar Clamp Mount
The Beeline Moto II Bar Clamp Mount has been redesigned for a cleaner look and improved durability. Follow this step-by-step guide to install it securely on your handlebars.
What You’ll Need
- 1 x Metal bar clamp mount
- Spacers for bar diameters: 22.2 mm, 25.4 mm, 28.6 mm, 31.8 mm
-
2x screws:
- 1 x M3 x 12 mm socket head screw (note: labelled “M4 x 12 mm” in early install guides)
-
1 x M4 x 8 mm countersunk screw
Tools You’ll Need
- 2.5 mm hex key (not included – available at beeline.co/hex-keys)
- 3 mm hex key
Step-by-Step Installation
1. Disassemble the mount
Your mount will arrive pre-assembled. Using a 2.5 mm hex key, remove the mount insert from the clamp. Loosen the clamp piece, keeping a hand under the mount to avoid losing screws.
2. Select the correct spacer
Choose the shim that matches your handlebar diameter. Wrap it securely around your bar.
3. Fit the clamp
Position the clamp over the shim, ensuring the teeth on the upper and lower halves align properly.
4. Tighten the clamp
Insert the M3 x 12 mm screw and secure it with a 2.5 mm hex key.
5. Refit the insert
Place the mount insert back into the cavity. Make sure it’s aligned so your Moto II locks in with the power button facing forward (riding position). Test the alignment before tightening.
6. Secure the insert
Use a 3 mm hex key to fasten the M4 x 8 mm screw into the cavity.
7. Ready to ride
Insert your Beeline Moto II, check it’s locked in securely, and you’re good to go!

Installing Your Beeline Moto II Ball Mount
The Beeline Moto II Ball Mount is compatible with a wide variety of 1-inch ball mounts and clamps, giving you the flexibility to position your device exactly how you want it. Follow these simple steps to set it up securely on your bike.
What You’ll Need
-
Tools:
- 2.5 mm hex key
- 4 mm hex key
-
Bolt size (for replacements):
- 1 x M5 x 16 mm cap head screw
Note: The 1-inch ball clamp or base ball required for installation is sold separately. Hex keys are not included to reduce waste, but you can purchase them at beeline.co/hex-keys.
Step-by-Step Installation
1. Loosen the ball clamp
Ensure any device currently attached to the clamp is secure before loosening.

2. Insert the ball mount
Place the Moto II ball mount into the clamp and tighten until it is held firmly in place.

3. Adjust the position
If needed, loosen the clamp to reposition the mount at the desired angle, then re-tighten to lock it securely.

4. Fine-tune the viewing angle
To tilt the headpiece, loosen the mount’s side screw with a 4 mm hex key, adjust to your preferred angle, and re-tighten.
5. Attach your Beeline Moto II
Snap your device into the mount and ensure it is secure before riding.
Installing Your Beeline Moto II Fork Stem Mount
The Fork Stem Mount is ideal for motorcycles with clip-on handlebars (such as sports bikes and café racers). Designed to fit securely into the central hole of the fork stem, this mount gives you flexibility in how you position your Beeline Moto II. You can mount it flush with the bars or use the included modular parts to adjust the angle and offset for the perfect view.
What You’ll Need
- Fork Stem Mount (with 2.5 mm hex + M4 x 40 mm countersunk centre screw)
- Small spacer (fits 12 mm – 18.5 mm diameter)
- Large spacer (fits 18.5 mm – 25.4 mm diameter)
-
Modular Mount Extender Kit:
- Modular mount insert adapter
- Modular mount extension arm
- Modular mount head
Other Tools You’ll Need
- 2.5 mm hex key
- 4 mm hex key
Hex keys are not included to reduce waste.
Step-by-Step Installation
Option A: With Modular Extension Kit
This setup allows you to position your Beeline Moto II offset from the fork stem tube, giving you greater flexibility in angle and viewing position.
- Choose the correct spacer (small or large) to match the diameter of your fork stem. Insert the spacer into the fork stem hole.
- Place the Fork Stem Mount into the spacer and secure it with the M4 x 40 mm countersunk screw using a 2.5 mm hex key.
- Attach the modular insert adapter to the base of the mount.
- If you want additional reach, connect the extension arm between the insert adapter and the mount head. If not, connect the mount head directly.
- Attach the modular mount head securely using a 4 mm hex key.
- Adjust the angle and offset of the head until your Beeline Moto II is in the perfect riding position, then tighten all screws.
- P op your Beeline Moto II into the mount and check that it locks in securely before riding.

Option B: Flush Mounting
This setup keeps the device centred and low-profile, directly above the fork stem.

Step 1: Prepare Your Fork Stem
- Remove any caps or covers from the fork stem tube where you plan to install the mount.
- Check that the inside surface of the tube is clean. We recommend wiping it down with a degreaser to ensure a secure grip
Step 2: Choose the Correct Spacer
- Measure the diameter of your fork stem tube.
- Select either the small spacer (12–18.5 mm) or large spacer (18.5–25.4 mm) and fit it into the stem tube.
- Lightly tighten the main insert screw to hold the mount parts together during installation.

Step 3: Install the Fork Stem Mount
- Insert the mount (with the spacer fitted) into your fork stem tube.
- Using a 2.5 mm hex key, tighten the main insert screw.
- As you tighten, the spacer will expand inside the stem tube, locking the mount securely in place.

Step 4: Add the Modular Extension Kit (Optional)
- For more flexibility in positioning, attach the extension arm and/or modular mount head.
- Use a 4 mm hex key to loosen, adjust, and retighten the bolts until the mount is angled correctly.
- If offset, rotate the insert so your Beeline device faces forward.

Step 5: Mount Your Beeline Moto II
- Clip your Beeline Moto II into place.
- Double-check it is snug and facing forward before riding.

Notes
- The modular extender includes a feature for neatly attaching a zip tie if you’re using the Powered Mount Insert accessory.

- Installation requires 2.5 mm and 4 mm hex keys (not included).
- Compatibility: Works with Moto II devices, or with original Moto devices using the Original Moto to Moto II Mount Adapter. Not compatible with the Moto II Universal Mount or Original Beeline Moto mounts.
Installing Your Moto II Universal Mount
Every Moto II device includes a Universal Mount in the package. This lightweight, low-profile mount is designed to fit almost any handlebar—round, oval, or otherwise—with diameters ranging from 18–36 mm. Installation is quick and simple, just like the mount itself.
Note: The Universal Mount can also be used with certain clip-on bar setups by attaching it to the top yoke triple clamp.
What You’ll Need
- 1 × Universal Mount
- 2 × 50 mm silicone bands
- 2 × 30 mm silicone bands
Step-by-Step Installation
-
Select band size
Choose the silicone band size (30 mm or 50 mm) that best fits your handlebar.
-
Attach silicone bands
Insert each band into the two wings of the mount. You may need to pull firmly until the bands snap into place—this ensures they stay secure when adjusting or removing the mount.
-
Position the mount
Place the mount on your handlebar at your desired location, with the grey silicone side facing downward.
-
Secure the mount
Wrap each silicone band tightly around the handlebar and hook it into the opposite wing to lock the mount in place.
- Your mount is now ready.
Installing Your Moto II Powered Mount Insert
Keep your Moto II charged while you ride. The Powered Mount Insert (PMI) upgrades compatible mounts* to supply continuous power to your Moto II.
Not compatible with the Universal Mount or original Moto mounts.
What You’ll Need
- Powered Mount Insert
- Extended mount insert bolts
- M4 × 18 mm countersunk
- M4 × 22 mm countersunk
- 2 m 12V battery terminal cable
- 2 × zip ties
Tools Required
-
2.5 mm hex key (not included, to reduce waste).
If you don’t already have one, you can get one from beeline.co/hex-keys.
Important Safety Note
Before installation, switch off your motorcycle engine.
Step-by-Step Installation
1. Prepare the Mount
- Remove the existing mount insert.
- For ease, install your mount on the bike first, then install the Powered Mount Insert inside it.
- For mount-specific installation guides, see the relevant support articles.

2. Fit the Powered Mount Insert
- Place the PMI into the mount cavity.
- Use the correct screw length supplied:
- 22 mm for Mirror or Crossbar Mounts
- 1 8 mm for all others
-
Ensure the cable runs cleanly from the top or bottom of the mount before tightening.

3. Access the Battery
- Locate your motorcycle battery (check your user manual if unsure).
- If your bike already has an SAE wiring harness, skip to step 8.
- In this case, you can use the PMI directly with the harness but must include the 1A fuse from the provided battery cable.
- Remove the bolts holding your existing battery terminals.

5. Connect the Wires
- Attach the red ring terminal to the positive (+) contact.
- Attach the black ring terminal to the negative (–) contact.

6. Reattach Terminal Bolts
- Tighten the bolts securely to hold the terminals in place.
7. Route the Cable
- Plan a neat cable run that avoids tension, sharp bends, or interference with steering/controls.
- Depending on your bike, you may tuck the cable under the tank, along side panels, or behind fairings.
- Use the included zip ties to secure the cable.
- Leave ties loose until you’ve tested full left and right handlebar movement.
- Tighten once correct slack is confirmed.
8. Connect the Power
- Plug the battery cable and PMI connectors together until fully seated.
9. Test Charging
- Attach your Moto II to the mount.
- Confirm the device shows it is charging.
10. Finalise Installation
- Refit your seat (if removed) and you’re ready to ride! 🚀
Technical Notes
- Moto II draws 5.4V, 0.5A max
- PMI converts 12V battery power → 5.4V.
Note: Never connect the Moto II directly to 12V, as this will damage the device.
Auto Power Switching
- Charging starts automatically when the Moto II is attached.
- The device will trickle charge even with the ignition off.
- To switch charging off, remove the device.
- If storing the bike for long periods, disconnect the SAE connector.
Installing Your Moto II Mirror/Crossbar Mount
The Mirror & Crossbar Mount is designed for mounting your Moto II on mirror stalks or crossbars. With adjustable clamp, head, and insert positions, you can customise the setup to find the perfect viewing angle.
What You’ll Need
- Mirror & crossbar clamp
- Mount with clamp piece and head piece
-
Screws (pre-installed in the mount):
- 1 × M4 × 14 mm socket head (requires 3 mm hex key)
- 1 × M4 × 12 mm countersunk head (requires 2.5 mm hex key)
- Spacers for bar diameters: 10 mm, 12 mm, 14 mm, 16 mm
Note: The first production batch includes a replacement screw. If present, please replace the original screw with this one.
Tools Required
- 2.5 mm hex key
-
3 mm hex key
(Not included to reduce waste. If you don’t have these tools, visit beeline.co/hex-keys.)
Step-by-Step Installation
1. Disassemble the Mount
- The mount arrives pre-assembled.
- Use a 2.5 mm hex key to remove the head piece from the clamp.
- Loosen the clamp piece with the same key.
- Hold the mount in your hand during disassembly to avoid losing screws.
Tip: If the rubber screw retainer comes apart, see the note at the end of this guide for reassembly instructions.
2. Choose and Fit the Spacer
- Select the correct bar shim (10/12/14/16 mm) for your handlebar or mirror stalk.
- Wrap the shim around the bar where the mount will be attached.
3. Attach the Clamp
- Place the clamp piece over the shimmed bar.
- Align the teeth on the top and bottom halves of the clamp.
- Secure the clamp with the M4 × 14 mm screw using a 3 mm hex key.
4. Position the Head Piece
- Align the inverted groove on the head piece with the raised groove on the clamp piece.
-
Rotate the head to set your preferred viewing angle.
- Sit on your bike to check visibility before final tightening.

5. Secure the Head Piece
- Insert the M4 × 12 mm screw and tighten with a 2.5 mm hex key.
6. Install Your Moto II
- Place your Moto II device into the mount.
- Check that it sits securely before riding.
Note: If the retainer nut assembly separates during installation:
- Insert the metal retaining nut into the rubber caddy.
- Push the assembly back into place.
-
Secure it by adding the correct bar spacer.

Installing Your Moto II Modular Mount Extender Kit
Fully adjustable with a removable extender arm, this Extender Kit adds extra height and flexibility to Moto II mounts*. Whether you’re looking to mount your Beeline on the stem, dash, mirrors, or beyond, the Extender Kit helps you achieve the perfect position.
Note: This is not a standalone mount. It must be used with compatible Beeline Moto II mounts.
This kit also lets you create your own custom setup by combining it with action camera mounts. GoPro combos are possible!
In the example below (right-hand image), the Extender Kit is shown with a Bar Clamp Mount and Powered Mount Insert, making use of the extension arm’s built-in cable routing feature:

Note: Not compatible with Original Moto mounts or Moto II Universal mounts.
What You’ll Need
- Modular mount insert adapter
- Modular mount extension arm
- Modular mount head
Other Tools You’ll Need
- 2.5 mm hex key
- 4 mm hex key
We’ve chosen not to include hex keys to reduce waste. If you don’t already have them, please visit beeline.co/hex-keys.
Bolt Sizes (for replacement if needed)
- M5 x 16 mm cap head × 2
Installing Your Moto II AMPS Mount
The Moto II range now includes our versatile AMPS mount, designed for a wide range of applications. It features the standard AMPS 4-hole bolt pattern and can also be fitted using the included 3M VHB adhesive pad. This makes it ideal for adventure bikes with AMPS brackets, car dashboards, or custom mounting setups.
What’s included:
- 4-hole AMPS mount
- M4 x 8mm countersunk retaining bolt (pre-installed in the mount)
- 3M VHB adhesive pad (optional for installation)
Installation options
The AMPS mount can be installed in two simple ways:
A – Direct fit to AMPS standard nav plates
Just remove the existing mount from your AMPS bracket, position the Moto II AMPS mount in place, and secure it with the original bolts.

B – Using the 3M VHB adhesive pad
Attach the mount to any suitable location with the supplied 3M VHB pad. Make sure the surface is flat, clean, and thoroughly degreased before applying for the best adhesion.

You’re done, as simple as that.
Installing Moto II Mount Insert Adapters
We know many riders already have a Moto mount they love but may want to switch to a Moto II device—or perhaps you’re running an original Moto device and just want the upgraded Moto II mount. Our mount insert adapters make it easy to mix and match, so you can ride exactly how you’d like.
Choosing the right adapter
- Moto II device → Original Moto mount: Use the Moto II to Original Moto Mount Adapter.
- Original Moto device → Moto II mount: Use the Original Moto to Moto II Mount Adapter.
Installation steps
-
Remove the current insert
Take out the existing insert from your premium mount*, making sure to keep the retaining screw.
Note: Insert adapters are not compatible with Universal mounts.
-
Fit the new adapter
Place the new insert adapter into the mount cavity. Ensure it is positioned so the device locks securely into the forward riding position (with the power button facing straight ahead). Double-check this alignment before tightening.
-
Secure the adapter
Reuse the original retaining screw to fasten the new insert adapter in place.
Note: For the original Moto Scooter Mirror Mount, the screw is secured with a retaining circlip that must be removed before replacing the mount insert. To access it, peel back the rubber grip on the top part of the clamp, then remove the circlip using pliers or a flat-bladed screwdriver.
-
Check orientation
Lock your Beeline in place to confirm the orientation is correct, then you’re ready to ride!
Shop Beeline Mounts
-
Beeline Bar Clamp Mount
Regular price $64.99 AUDRegular priceUnit price per -
Beeline Mirror and Cross Bar Mount
Regular price $64.99 AUDRegular priceUnit price per -
Beeline Powered Mount Insert
Regular price $109.99 AUDRegular priceUnit price per -
Beeline Fork Stem Mount
Regular price $64.99 AUDRegular priceUnit price per


Replacement Shims for Moto Mounts
Shop Moto II
-
Beeline Moto II Black
Regular price $379.99 AUDRegular priceUnit price per -
Beeline Moto II Anniversary Edition
Regular price $599.99 AUDRegular priceUnit price per -
Beeline Moto II Classic Edition
Regular price $499.99 AUDRegular priceUnit price per


